Introduction
Bathroom floors usually don’t get much love. They’re walked on, wet all the time, and let’s be honest most of us only notice them when they’re disgustingly bad. But when it comes to small spaces like Lil Enzo bathroom, every detail counts. A cracked tile here or a moldy grout line there can make the whole room feel…gross. That’s exactly why we decided to flip the switch and give Lil Enzo bathroom floor Renovate a total refresh. The result? A cozy, fresh, and Instagrammable space that proves even tiny bathrooms can make a huge impression.
The Problem with Old Bathroom Floors
Cracks, Grout, and Mold Oh My!

Let’s talk real: old bathroom floors are a breeding ground for everything you don’t want in a clean space. In Lil Enzo’s case, the tiles were cracked, the grout lines were blackened, and the floor had an ever-present damp smell that no amount of cleaning could erase. And don’t even get us started on the mystery stains that might have been toothpaste… or worse.
Why DIY Patching Isn’t the Answer
Sure, we tried a quick fix or two. Regrouting, replacing a tile, slapping on some sealant. But those patches only made things look worse. Like putting a band-aid on a broken leg it just didn’t cut it. That’s when we knew it was time to rip the whole thing out and start fresh.
Meet Lil Enzo: Big Vision, Small Space
Who or What Is Lil Enzo?
Lil Enzo isn’t a celebrity (yet) he’s the youngest member of the household. A toddler with big opinions and a bathroom that’s all his. Think height plastic step stools, rubber duckies, and superhero toothpaste. That meant his bathroom had to handle rough play, be playful in design, and clean up without a hassle.
The Story Behind the Bathroom Makeover
We didn’t start out planning a full renovation. It began with the floor looking grimy and grew into a full-on mission to turn Lil Enzo’s bathroom into a place that’s both functional and stylish. Plus, if we’re being honest, we wanted something that wouldn’t make guests gag when they peeked inside.
Planning the Renovation: Step One
What’s the End Goal?
Before touching a single tile, we had to get clear on what we wanted. This wasn’t about building a spa it was about creating a clean, kid-friendly space that could handle water, messes, and years of use. Style was important, but durability came first.
Choosing the Right Flooring Materials
Vinyl vs Tile: The Showdown
Tile looks great, but vinyl? Vinyl wins when you’ve got a kid like Enzo who treats every bath like a pool party. We went with luxury vinyl planks waterproof, affordable, and easy to install. And the best part? They give off the vibe of real wood or tile minus the headache of maintaining it.
Waterproof and Kid-Proof? Yes, Please!
The material had to stand up to splashes, toy cars, and occasional toothpaste art projects. The luxury vinyl we picked was textured for slip resistance and sealed tight so nothing could seep underneath.
Prepping for the Reno: What You Need to Know
Tearing Out the Old Floor

Step one? Say goodbye to the old mess. We chiseled out the tiles, pried up the backer board, and dumped all the moldy grout into the trash. Pro tip: wear a mask. It gets gross real fast.
Fixing the Subfloor Drama
Once the old floor was gone, surprise there was water damage in the subfloor. Classic. We had to patch it with new plywood and use a moisture barrier to protect the new flooring. Lesson learned: never assume the subfloor’s fine just because it’s hidden.
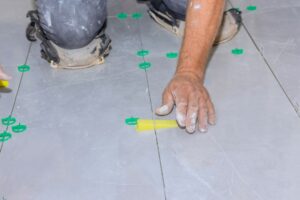
Installation Day: Go Time!
Laying Down the New Floors
We measured, cut, and clicked the planks into place like a giant puzzle. No glue, no nails just a floating floor that locked together seamlessly. Honestly, it was kinda satisfying, like adult Legos.
Dealing with Corners and Curves
Corners are always tricky, especially in older homes where nothing’s perfectly square. We had to custom-cut a few planks to fit around pipes and weird angles, but patience (and a good jigsaw) paid off.
The Final Look: From Meh to Marvelous
Before and After: A Total Glow-Up
What used to be a grimy, cracked floor now looks sleek, clean and modern. The soft gray tone of the planks brightens up the space without making it look sterile. It even feels better underfoot.
Family Reactions and Instagram Brags
Lil Enzo loves it. He rolls his toy trucks across the floor and gives tours to anyone who’ll listen. And yeah, we may have posted a few humble brags online. The “before and after” photos got more likes than our last vacation pic.
Lessons Learned from Lil Enzo’s Reno
What Worked Like a Charm
Floating vinyl flooring was the MVP easy to install, budget-friendly, and kid-proof. Prepping the subfloor properly also saved us a ton of future headaches.
What We’d Do Differently Next Time
We wish we’d tested a few samples first in the actual lighting of the room. The one we chose looked a bit different once installed, though we still love the outcome. Also, budget for trim pieces those get pricey.
Cost Breakdown: Was It Worth It?
Budgeting for a Small-Bathroom Reno
Here’s the breakdown:
Vinyl flooring: $150
Subfloor patch: $60
Tools and supplies: $90
Total cost: $300 (not including our time)
Hidden Costs You Should Know About
We didn’t plan for trim pieces or moisture barrier sheets, which added an unexpected $40. And the disposal of the old tile was another $20 at the local dump.
Is It Your Turn to Renovate?
Signs Your Bathroom Floor Needs an Upgrade
If your Enzo bathroom smells damp, has chipped tiles, or you’ve tried cleaning but it still looks dirty you probably need a floor upgrade.
Tips to Make It Less Overwhelming
Start small. Choose materials that are beginner-friendly. Watch a few YouTube tutorials. And don’t be afraid to ask for help or hire out the tricky stuff (like plumbing, if it’s involved).
Personal Experience
In my recent small bathroom makeover, I revamped the walls with peel-and-stick tiles in calming grays and added floating shelves for scented candles and potted ferns. Drawing inspiration from Lil Enzo’s floor renovation ideas, I coordinated the wall design to create a cohesive spa vibe. This upgrade turned my mundane routine into a daily oasis, easing morning stress and enhancing relaxation after busy days.
Key Facts on Bathroom Wall Decor
Moisture-resistant vinyl wallpapers prevent peeling in humid environments, allowing bold patterns without long-term damage to walls.
LED-backlit mirrors distribute even light, reducing shadows and making small bathrooms feel more spacious and inviting.
Incorporating biophilic elements like faux ivy walls boosts mood by connecting users to nature, lowering anxiety levels.
Herringbone tile accents add visual depth, transforming plain walls into focal points with minimal installation effort.
Customizable floating ledges optimize storage, displaying essentials while maintaining a clutter-free, aesthetically pleasing layout.
Conclusion
Renovating Lil Enzo bathroom floor might’ve started as a simple fix, but it turned into something way more rewarding. It’s proof that even a small change in a tiny room can have a big impact especially when that room belongs to someone who’s going to grow up remembering it. So if your bathroom floor’s looking sad, maybe it’s time to give it the Lil Enzo treatment. Trust me it’s worth every penny, every hour, and every piece of pulled-up tile.
FAQs
Q1: How long did the bathroom floor renovation take?
About two full days, including prep, removal, subfloor repair, and installation.
Q2: Is vinyl flooring safe for kids and bathrooms?
Yes! Modern luxury vinyl is waterproof, slip-resistant, and durable enough for daily wear and tear.
Q3: Can I install vinyl flooring myself with no experience?
Absolutely. With a few basic tools and some patience, it’s one of the most beginner-friendly DIY projects.
Q4: What’s the biggest mistake to avoid during a bathroom floor reno?
Skipping subfloor inspection. Always check for water damage or mold before installing new flooring.
Q5: How can I make a small bathroom look bigger after renovating the floor?
Use lighter flooring tones, keep the decor minimal, and add mirrors to reflect light and space.